Using MongoDB in The Cloud with Atlas
In this blog I'am going to show you how to set up MongoDB Atlas.Atlas allows you to have MongoDB which is a NoSQL database in the Cloud so that you don't have to have it in your Local machine.So let's get started!
So first thing you want to do is go to https://www.mongodb.com/ .

Go to Products on the top and choose MongoDB Atlas which is the first option.

Now this page should appear.Next you have to either Sign up or Login if you already have an account.If you don't have an account click on the button "Start free" it will take you to the sign up form.If you do have an account click on the Sign in button.
After you sign in successfully you will be directed to your Atlas account.

Now click on build a Cluster option.Then you will be taken to the Global Cluster configuration page.

In the configuration page there are a few options to select.First you need to pick your cloud provider.You can pick any provider you like for this.

Here you have to pick the data center you wish to store your data on.

For the Cluster Tier pick the free version for now which is good for development but if you are in production you may probably want to upgrade to a better version.
Also leave the additional settings as it is for now.

Then finally the Cluster Name.Give any name you like.
Now just click the Create Cluster button on the bottom.Atlas will now start building your first cluster but this may take a while.So until it creates the cluster we will see how to create our first user.

Go to Security tab next to overview.Then click on the ADD NEW USER button on the right.

Enter the username and password you wish.Choose User privileges you want.Read and Write would be good for now.You can also make the user temporary by ticking the option at the bottom and giving a time line.Then click Add User button and you will see the newly created user.So basically this user will be able to write and read from any database.
Now next thing you want to do is go to IP White list tab next to MongoDB users tab under the security section.Then click on Add IP address.

There are couple things here you could do.You can add your current IP address which is your development machine's IP address and once deploy you can use your server's IP address or you can choose the option to allow access from anywhere.This will allow us to connect from anywhere given the username and the password.Choose one type and click the confirm button and your IP address will be added.
Okay now for the final step.Go back to overview tab next to the security tab.Now most probably your cluster must be ready if not give it some more time and move on to next step.

Our final step is to connect to our cluster.So click on connect
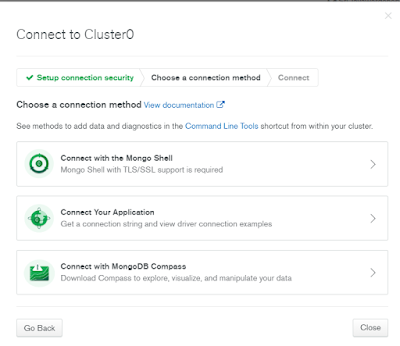
So here we have several options.Choose 1st option if you want to connect through Mongo Shell.Choose Second option if you want Connect to one of your applications and the 3rd option is to connect to MongoDB Compass which is an application you can download and install to manage your databases locally.For this example we will take the 2nd option.

Copy the connection String to your application as the mongoURI and change the password to the password you entered for the relevant User.
That's it! You have successfully made a Cloud database on Atlas and connected to it through your application.
So first thing you want to do is go to https://www.mongodb.com/ .

Go to Products on the top and choose MongoDB Atlas which is the first option.

Now this page should appear.Next you have to either Sign up or Login if you already have an account.If you don't have an account click on the button "Start free" it will take you to the sign up form.If you do have an account click on the Sign in button.
After you sign in successfully you will be directed to your Atlas account.

Now click on build a Cluster option.Then you will be taken to the Global Cluster configuration page.


Here you have to pick the data center you wish to store your data on.

For the Cluster Tier pick the free version for now which is good for development but if you are in production you may probably want to upgrade to a better version.
Also leave the additional settings as it is for now.

Now just click the Create Cluster button on the bottom.Atlas will now start building your first cluster but this may take a while.So until it creates the cluster we will see how to create our first user.

Go to Security tab next to overview.Then click on the ADD NEW USER button on the right.

Enter the username and password you wish.Choose User privileges you want.Read and Write would be good for now.You can also make the user temporary by ticking the option at the bottom and giving a time line.Then click Add User button and you will see the newly created user.So basically this user will be able to write and read from any database.
Now next thing you want to do is go to IP White list tab next to MongoDB users tab under the security section.Then click on Add IP address.

There are couple things here you could do.You can add your current IP address which is your development machine's IP address and once deploy you can use your server's IP address or you can choose the option to allow access from anywhere.This will allow us to connect from anywhere given the username and the password.Choose one type and click the confirm button and your IP address will be added.
Okay now for the final step.Go back to overview tab next to the security tab.Now most probably your cluster must be ready if not give it some more time and move on to next step.

Our final step is to connect to our cluster.So click on connect
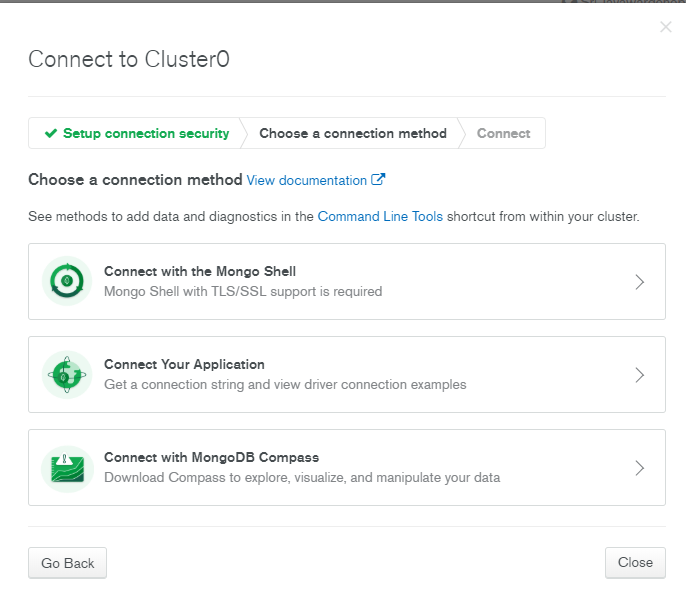
So here we have several options.Choose 1st option if you want to connect through Mongo Shell.Choose Second option if you want Connect to one of your applications and the 3rd option is to connect to MongoDB Compass which is an application you can download and install to manage your databases locally.For this example we will take the 2nd option.

Copy the connection String to your application as the mongoURI and change the password to the password you entered for the relevant User.
That's it! You have successfully made a Cloud database on Atlas and connected to it through your application.


Comments
Post a Comment